How to Grow Tomatoes: A Complete Guide for Beginners
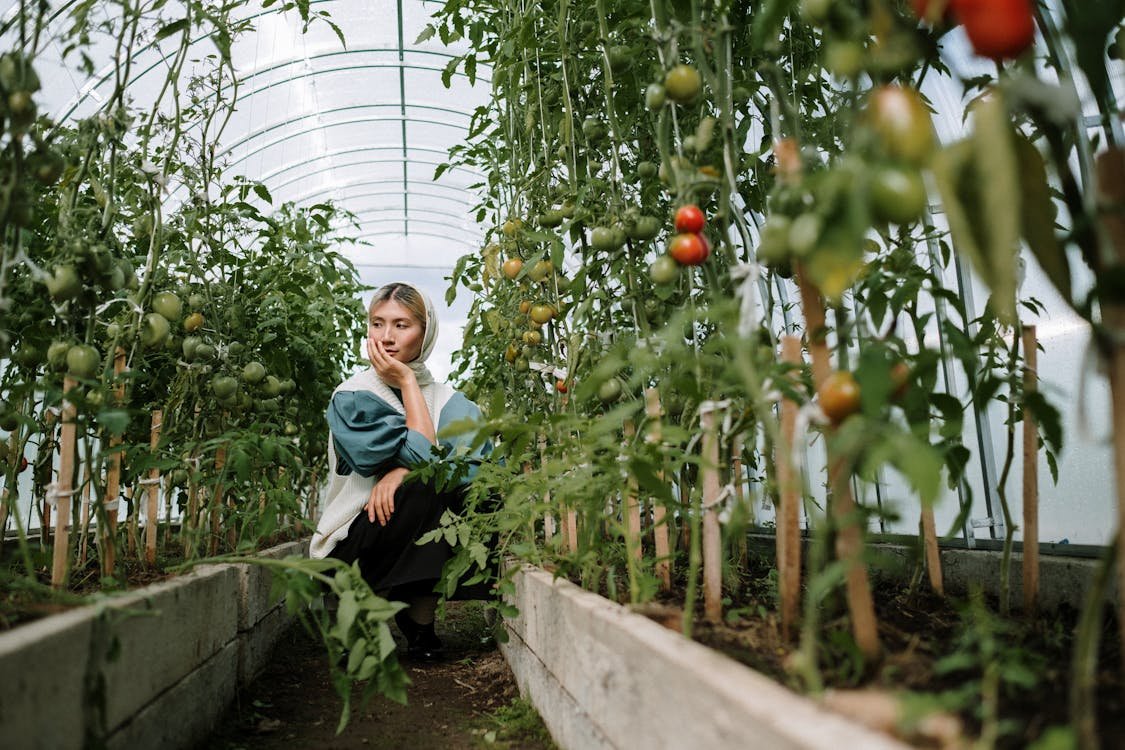
Tomatoes are the most popular vegetable grown in American home gardens—and for good reason. Homegrown tomatoes taste categorically better than anything sold at a grocery store. If you’re still deciding what else to plant alongside them, check out our guide to the best vegetables to grow at home. A sun-warmed tomato picked ripe from the vine is one of summer’s great pleasures. But tomatoes have a reputation for being demanding. This guide demystifies tomato growing from start to finish.
Understanding Tomato Types
Before choosing varieties, understand the two fundamental growth types:
Determinate (“bush”) tomatoes: Grow to a fixed size, produce most of their fruit over a 4–6 week period, then stop. Good for canning (all fruit ripens at once) and for gardeners who want less pruning. Often listed as “VF” varieties.
Indeterminate tomatoes: Keep growing until killed by frost; produce fruit continuously throughout the season. Most heirloom varieties are indeterminate. Need regular pruning and staking. Best for continuous fresh eating.
Popular varieties for beginners:
- Cherry/small: Sungold, Sweet 100, Black Cherry, Yellow Pear
- Slicing: Early Girl, Better Boy, Brandywine (heirloom), Cherokee Purple (heirloom)
- Paste/sauce: Roma, San Marzano, Amish Paste
- Beginner-friendly: Celebrity, Juliet (hybrid cherry), Early Girl
When to Plant Tomatoes
Tomatoes are frost-sensitive and cold-soil-sensitive. Don’t rush planting.
Plant outdoors when:
- All danger of frost has passed (check your local last frost date)
- Soil temperature is at or above 60°F (ideally 65°F)
- Nighttime temperatures are consistently above 50°F
In most of the US, this means:
- Southeast and Gulf Coast: February–March
- Mid-Atlantic and Midwest: May (after last frost)
- Northern states: Late May to early June
- Pacific Northwest: Late May
Starting from seed indoors: Start 6–8 weeks before your outdoor transplant date. Place under grow lights (16 hours per day) or in a very sunny south-facing window.
Hardening off: Don’t go straight from indoors to full outdoor sun. Set transplants outside in a shaded, protected location for 30–60 minutes on day one; increase exposure over 7–10 days before leaving them out full-time.
Choosing the Right Location
Sunlight: 8+ hours of direct sun is ideal; 6 hours is the minimum for acceptable fruiting. More sun = more and better tomatoes.
Soil: Rich, well-drained, slightly acidic (pH 6.0–6.8). Avoid spots where tomatoes, peppers, or eggplant grew in the last 2–3 years (disease rotation).
Air circulation: Good airflow reduces fungal disease. Don’t crowd plants.
Soil Preparation
Tomatoes are heavy feeders that reward excellent soil preparation, and the University of Minnesota Extension’s tomato growing guide provides detailed recommendations on building healthy soil for tomatoes. If you’re growing in a raised bed, our guide to the best soil for raised vegetable garden beds will help you build the ideal growing medium.
- Add 3–4 inches of compost and work it 12 inches deep.
- Adjust pH if below 6.0 (lime) or above 7.0 (sulfur).
- Add calcium: Calcium deficiency causes blossom-end rot—a common tomato problem. Mix 1 cup of ground calcium carbonate (lime) into the soil of each planting hole, or mix in crushed eggshells.
- Optional: Add a balanced slow-release fertilizer to each planting hole.
How to Plant Tomatoes Correctly
Here’s the trick that dramatically improves tomato plant vigor: plant tomatoes deep.
Unlike most plants, tomatoes form roots along their buried stems. A deeply planted tomato develops a much larger root system, meaning better water and nutrient uptake and a stronger, more drought-tolerant plant.
Method 1 (Deep planting): Dig a hole 12–15 inches deep. Remove the lower 2/3 of leaves. Plant so only the top leaves and growing tip are above soil level.
Method 2 (Trench planting): Dig a trench 4–6 inches deep and long enough to lay the stem horizontally. Lay the plant in the trench at an angle, with only the top 4–6 inches emerging from the soil. Backfill. The buried stem quickly turns upward.
After planting:
- Water deeply
- Apply 2–3 inches of mulch around the base (keep mulch 2–3 inches from the stem to prevent rot)
- Install your stakes or cage immediately—don’t wait until the plant is large
Staking and Supporting Tomatoes
Tomatoes—especially indeterminate varieties—need support to grow upright and keep fruit off the ground.
Cages: Heavy-duty tomato cages (6+ feet tall) work well for indeterminate varieties. Standard hardware store cages (4 feet) are too small for most tomatoes. Make your own with concrete reinforcing wire (remesh) for inexpensive, durable, large cages.
Stakes: Drive a 6-foot wooden or metal stake into the ground at planting. Tie the main stem with soft ties (tomato clips, old t-shirt strips) every 12 inches as the plant grows.
Florida Weave: For multiple plants in a row, weave twine between stakes and plants at 12-inch intervals as plants grow. Inexpensive and effective.
Watering Tomatoes
Consistent watering is one of the most critical factors in tomato success.
Goal: Keep soil consistently moist 6–8 inches deep. Neither drought-stressed nor waterlogged.
Schedule: 1–2 inches of water per week; more during hot, windy weather. Deep, infrequent watering is better than light, daily sessions.
Method: Water at the base, not overhead. Wet foliage invites disease. Drip irrigation is ideal for tomatoes.
Irregular watering problems:
- Blossom-end rot: Dark, sunken spots on the fruit bottom; caused by calcium deficiency exacerbated by irregular watering. Solution: consistent watering + calcium in soil.
- Fruit cracking: Fruits split when the plant takes up a lot of water after a dry period. Solution: consistent watering.
Fertilizing Tomatoes
Tomatoes need different nutrition at different growth stages.
At planting: Balanced fertilizer or slow-release mixed into the planting hole.
During vegetative growth (first 4–6 weeks): Higher nitrogen; balanced NPK fertilizer.
Once flowers appear: Reduce nitrogen; increase phosphorus and potassium. Use a “tomato fertilizer” or bloom booster (5-10-10 or similar). Too much nitrogen at this stage produces lots of leaves and few fruits.
During fruiting: Continue with low-nitrogen, high-potassium fertilizer every 2–3 weeks. Add a calcium source if blossom-end rot appears (foliar calcium spray gives fastest results).
Pruning Tomatoes (Indeterminate Only)
Pruning indeterminate tomatoes is optional but improves air circulation, concentrates energy into fewer, larger fruits, and makes the plant more manageable.
What to remove: “Suckers”—the shoots that grow in the crotch (V-shape) between the main stem and a side branch. Remove when small (under 2 inches) by pinching with fingers. Larger suckers can be cut with clean pruners.
To prune or not: Heavy pruning (maintaining a single main stem) produces fewer, larger fruits earlier. Light pruning (keeping 2–3 main stems) produces more total fruit over a longer season. No pruning produces the most total yield but with more disease risk from reduced airflow.
Common Tomato Diseases and Prevention
Early Blight: Brown spots with yellow halos on lower leaves; progresses upward. Caused by Alternaria solani. Prevention: remove lower leaves from the bottom 12 inches of the stem; apply fungicide (chlorothalonil) before symptoms spread.
Late Blight: Dark, water-soaked lesions on leaves and fruit; can destroy plants within days in wet conditions. Apply copper fungicide preventively; remove and destroy infected plants immediately.
Septoria Leaf Spot: Small, circular spots with dark borders; progresses from bottom up. Remove infected leaves; apply fungicide.
Fusarium and Verticillium Wilt: Yellowing, wilting despite adequate water; vascular discoloration when stem is cut. No cure—plant resistant varieties (look for “VF” in the variety name) and practice crop rotation.
Prevention tips for all diseases:
- Mulch to prevent soil splash onto leaves
- Remove lower leaves to increase air circulation at soil level
- Water at the base only
- Apply preventive copper or chlorothalonil fungicide in wet weather
- Rotate crops (don’t plant in the same spot for 2–3 years)
Pest Management
Tomato Hornworms: Large, green caterpillars that can strip a plant in days. Hand-pick; apply Bt (Bacillus thuringiensis) for larger infestations. Check for parasitic wasp eggs on hornworms (white rice-like cocoons)—if present, leave the hornworm as the wasps will control future populations.
Aphids: Clusters on new growth; knock off with a strong water spray.
Spider mites: Fine webbing; stippled leaves. More common in hot, dry weather. Miticide or neem oil.
When to Harvest
Tomatoes are ready to harvest when:
- Fruit reaches full color for the variety
- Slightly soft when gently squeezed
- Detaches from the vine with a gentle twist
Ripening tip: Tomatoes ripen best at room temperature (65–70°F), not in the refrigerator. Cold temperatures destroy the volatile compounds that create tomato flavor.
Green tomatoes before frost: Bring green tomatoes indoors to ripen at room temperature. They won’t be as good as vine-ripened, but still far better than store-bought.
Growing great tomatoes takes practice, but the payoff is one of gardening’s greatest pleasures. Focus on consistent watering, good staking, and disease prevention—these three things account for most tomato success or failure. Cucumbers make an excellent companion crop; see our guide on how to grow cucumbers to plan your full garden. And if you’re just getting started, our guide on how to start a vegetable garden from scratch lays out everything you need before your first planting.