How to Start a Vegetable Garden from Scratch
Starting a vegetable garden from scratch is one of the most satisfying things you can do in your yard. Homegrown vegetables taste better than anything from the store, and the process of growing food connects you to the natural cycles of the seasons in a deeply rewarding way. But the first garden can also be overwhelming—where do you start? This guide takes you from bare ground to your first harvest.
Step 1: Start Small
The most common beginner mistake is planting too much too soon. A modest first garden—perhaps two 4x8-foot raised beds or a 10x10-foot in-ground plot—is far more manageable and rewarding than an ambitious 20x30-foot undertaking that becomes a maintenance burden.
A small garden done well teaches you far more than a large garden done poorly. You can always expand the following year based on what worked.
Good first garden sizes:
- Raised beds: Two 4x4 or 4x8-foot raised beds
- In-ground: 10x10 feet or 10x20 feet
- Container garden: 4–6 large containers (15+ gallons) on a patio
Step 2: Choose the Right Location
Sunlight: This is the non-negotiable requirement. Most vegetables—especially fruiting crops like tomatoes, peppers, cucumbers, and squash—need at least 6–8 hours of direct sunlight daily. Leafy greens and some herbs tolerate 4–5 hours.
Stand in your yard at different times of day. Watch where shadows fall from trees, structures, and fences. The sunniest spot is your best location.
Water access: You’ll water your vegetable garden frequently, especially in summer. Choose a location within easy reach of a hose or plan to run irrigation.
Level ground: Relatively flat areas are easier to manage. Sloped ground requires terracing or raised beds.
Proximity: The closer your garden is to your back door, the more you’ll use it. Convenience directly impacts how much you harvest.
Step 3: Decide: In-Ground or Raised Beds?
In-ground gardening:
- Less expensive to start
- Larger areas are more practical
- Requires improving native soil (may take time)
- More exposed to ground-dwelling pests
Raised beds:
- Higher upfront cost (materials + soil)
- Smaller footprint with higher productivity
- You control the soil quality from day one
- Better drainage, earlier spring planting
- No soil compaction
Recommendation for beginners: Raised beds are worth the investment. The ability to start with perfect soil eliminates one of the biggest variables in gardening success. Follow our complete walkthrough on how to build a raised garden bed to get started.
Step 4: Prepare the Soil
For Raised Beds
Fill with a quality growing mix: a blend of topsoil, compost, and a drainage amendment like perlite or vermiculite. A standard mix is 60% topsoil + 30% compost + 10% perlite. Our in-depth guide to the best soil for raised vegetable garden beds covers every ingredient and ratio in detail.
For In-Ground Gardens
- Remove existing vegetation (sod, weeds) by hand, sod cutter, or smothering with cardboard/newspaper covered by 6 inches of compost for 2–3 months.
- Till or loosen soil to 12 inches deep.
- Add 3–4 inches of compost and work it in thoroughly.
- Rake smooth and level.
- Test soil pH; most vegetables prefer 6.0–7.0. Adjust with lime (too acidic) or sulfur (too alkaline).
The most impactful thing you can do for a new in-ground garden is add compost. No amount of fertilizer compensates for poor soil structure. If you’re not already making your own, our beginner’s guide on how to start composting at home makes it simple.
Step 5: Choose What to Grow
Grow what your family actually eats. The most productive and satisfying garden is one full of vegetables you’re excited to harvest. For a ranked list of the easiest options, see our guide to the best vegetables to grow at home.
Best beginner vegetables (easy, productive, reliable):
- Zucchini: Almost impossible to fail; produces abundantly
- Tomatoes: Worth the effort; cherry tomatoes especially easy
- Bush beans: Plant, water, harvest. Very straightforward.
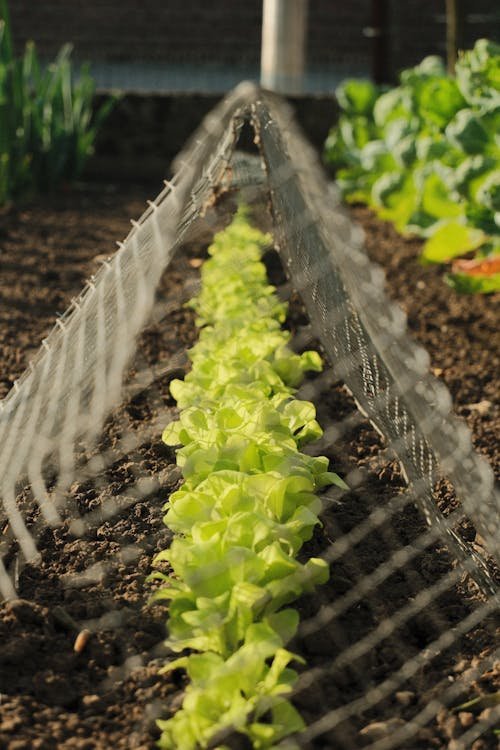
- Lettuce and salad greens: Fast-growing; harvest leaves in 30–45 days
- Cucumbers: Productive once established; need a trellis
- Basil: Thrives in summer heat; pairs perfectly with tomatoes
- Radishes: Fastest vegetable in the garden; 25 days to harvest
Save for year two (slightly more challenging):
- Peppers (slow to mature, need heat)
- Eggplant (heat-demanding)
- Melons (need lots of space)
- Sweet corn (needs large quantities to pollinate; space-inefficient in small gardens)
Step 6: Plan Your Planting Times
Every vegetable has a preferred planting season. Getting the timing right is critical.
Cool-season crops (plant 4–6 weeks before last frost; also plant in fall):
- Lettuce, spinach, kale, arugula, Swiss chard
- Peas, radishes, turnips, carrots
- Broccoli, cabbage, cauliflower
Warm-season crops (plant after last frost when soil is above 60°F):
- Tomatoes, peppers, eggplant
- Cucumbers, zucchini, squash
- Beans, corn, melons
Find your last frost date: Go to your cooperative extension website or search “average last frost date [your city].” This date is the anchor for all your spring planting timing.
Step 7: Decide: Seeds or Transplants?
Transplants (seedlings from a nursery):
- Faster results; eliminates the most fragile early stage
- More expensive per plant
- Limited variety selection
- Best for: tomatoes, peppers, eggplant, herbs, broccoli, cauliflower
Seeds:
- Far more variety options available
- Much less expensive
- Require starting indoors 6–8 weeks before planting date, OR direct-sowing in the garden
- Best for direct sowing: beans, peas, carrots, radishes, beets, corn, zucchini, cucumbers, squash
Beginner recommendation: Use transplants for tomatoes and peppers; direct-sow beans, zucchini, cucumbers, and leafy greens. This gets you the most reliable results with the least complexity.
Step 8: Plant Correctly
Transplants:
- Water the transplant before planting
- Dig a hole slightly deeper and wider than the root ball
- Place so the root ball is level with or slightly below the soil surface (tomatoes can be planted deep—up to 2/3 of the stem)
- Backfill and firm gently
- Water generously immediately after planting
Seeds:
- Follow the packet for depth (generally 2–3x the seed diameter)
- Space according to packet instructions
- Moisten soil before sowing; water gently after
- Label rows clearly
Step 9: Ongoing Care
Watering
Vegetables need consistent moisture—most need about 1 inch of water per week. During summer heat, more is often needed.
- Water at the base of plants, not overhead (reduces disease)
- Check soil moisture before watering—insert your finger 2 inches; water when it feels dry
- Morning watering is ideal
Mulching
Apply 2–3 inches of straw, shredded leaves, or wood chips around plants (keep away from stems). Mulch:
- Retains soil moisture (reduces watering by 30–50%)
- Suppresses weeds
- Regulates soil temperature
- Breaks down and improves soil over time
Fertilizing
- If using compost-rich soil, you may need minimal supplemental fertilizer
- A balanced vegetable fertilizer (10-10-10 or similar) applied every 4–6 weeks is a safe approach
- Heavy feeders (tomatoes, peppers) benefit from additional support, especially once fruiting begins
Pest Management
Check plants regularly. Common first-year garden pests:
- Aphids: Tiny clusters on new growth; knock off with water spray
- Caterpillars/hornworms: Hand-pick; apply Bt for serious infestations
- Slugs: Active at night; use beer traps or diatomaceous earth
- Deer and rabbits: Fencing is the only reliable solution
Step 10: Harvest Regularly
This is the step many beginners underdo. Most vegetables produce more when harvested frequently. Leaving mature zucchini on the plant, for example, signals the plant to slow down. Harvest beans, zucchini, cucumbers, and peppers every 2–3 days.
Harvest in the morning when vegetables have the highest water content and best flavor.
Growing your first vegetable garden is a learning experience—things will fail, plants will get pests, timing won’t always work out. That’s normal and expected. The experience you gain from one season is invaluable for the next. Start small, choose the right spot, use great soil, and harvest regularly—and you’ll be hooked for life.